Perform -> Journeys -> Add Journey
1. Info
Publish: Select if you want the Journey to be visible to the public.
Hide finished journeys to users: Define if the journey is hidden when a user finish it the public.
Name: Choose the name of the Journey.
Summary: A brief description of the Journey.
Description: A description of the Journey.
Why?: Why should users take this Journey?
Image: Select an image to represent the Journey.
Tags: Write multiple tags related to this journey.
Force Sequential Step Completion checkbox: Select the field if you want to force sequential step completion.
Target: You can target the journey to users and/or teams.
Sequential: If selected, the users will have to follow the steps of the Journey sequentially.
Language: Choose the language of the journey.
Excluded Languages: By adding languages to the excluded filter, it means users with this language won’t have access to the journey.
Available Countries: Choose the countries where the Session will be available. Leaving it empty means it will be available in all countries.
Content accessible before payment: This option will be accessible before the payment is approved.
Currency: Select the currency of the Journey
Price: Select the price of the Journey.
Promotional price: Select a promotional price of the Journey.
Promo Start Date: Define the start date for the promo.
Promo End Date: Define the end date for the promo.
2. SEO
Improve the SEO of the Journey in this step. You can edit:
Title
Description
Link: you can choose the slug of the journey
keywords
Image
3. Steps
Level: Choose the user level.
Max Days: Maximum days a user has to complete this step.
Question: Write here the question to ask.
If Type is
Skip Step: A new button “Skip Step” was added on the journey detail page when the step is optional.
Trophy: Choose trophy.
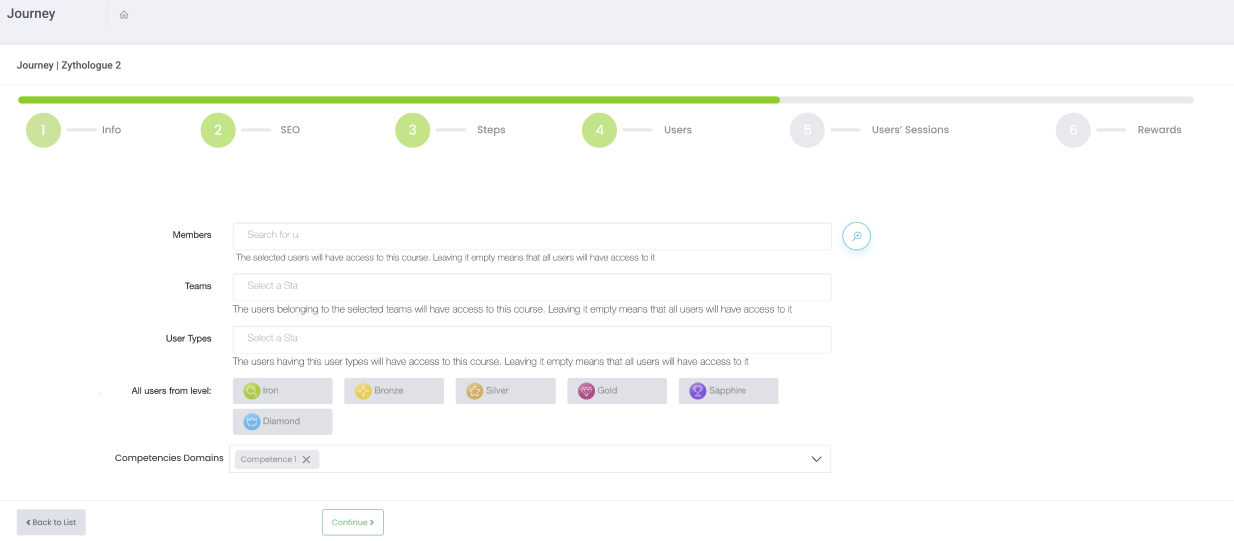
4. Users
Visible to All: U
sers will still see this journey on the listing and be able to open it, but they cannot access the content if they are not in the targets.
API Schema:visibleToAll → Boolean
Members: The selected users will have access to this challenge. Leaving it empty means that all users will have access to it;
Teams: The users belonging to the selected will have access to this challenge. Leaving it empty means that all users will have access to it;
User Types: The users having these user types will have access to this challenge. Leaving it empty means that all users will have access to it;
User Levels: you can choose the user level;
Competencies Domains: you can select several competencies.
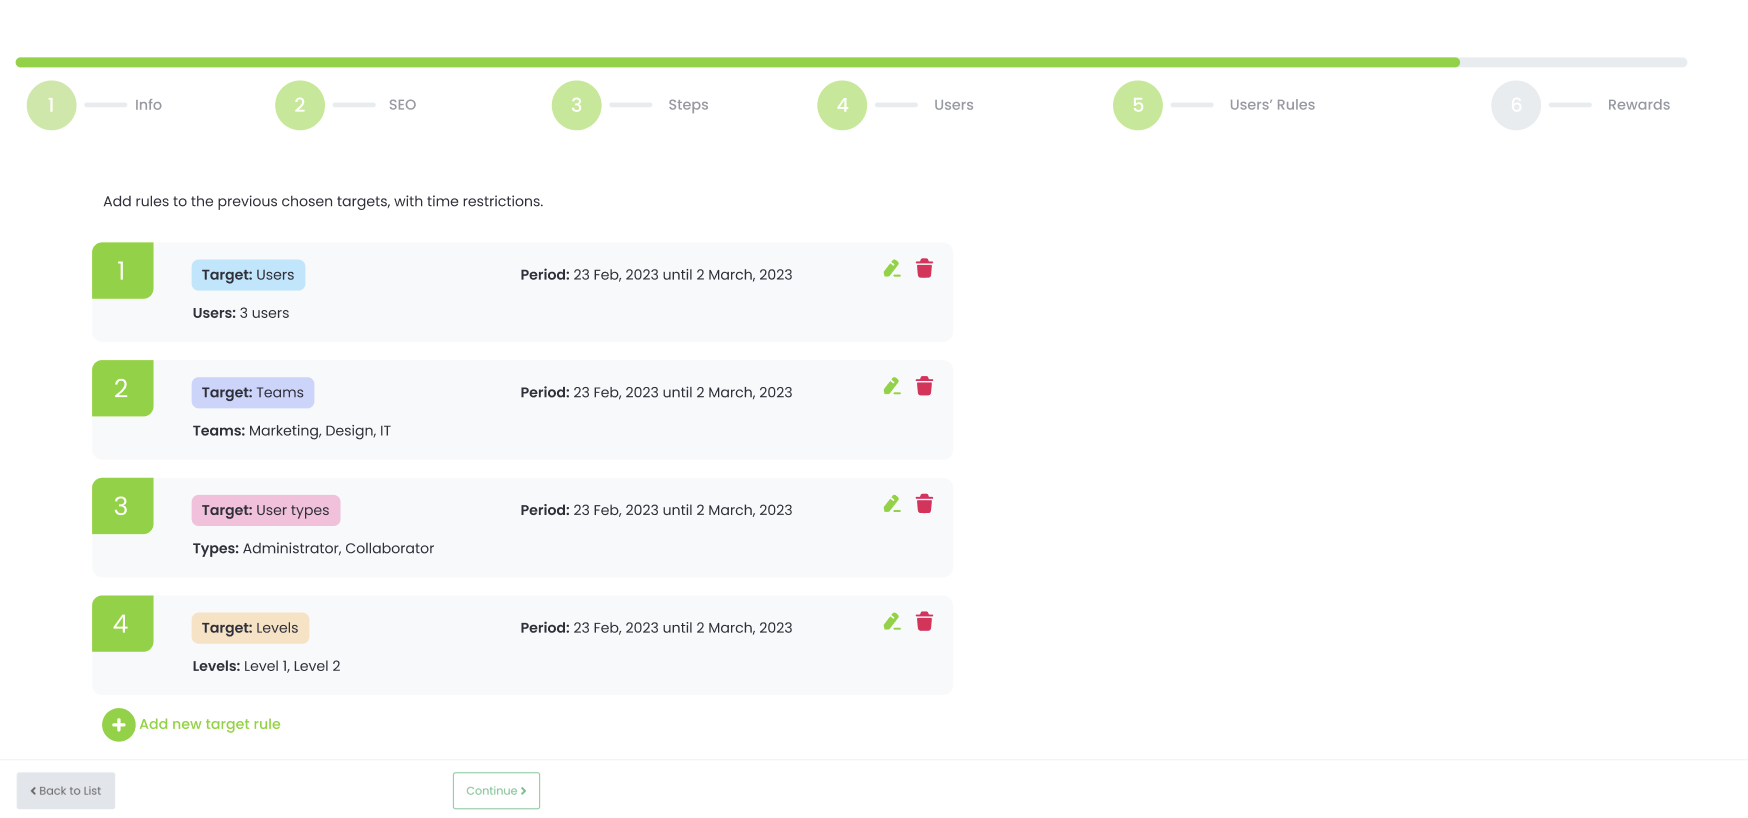
5. Users' Rules
Add rules to the previous chosen targets, with time restrictions.
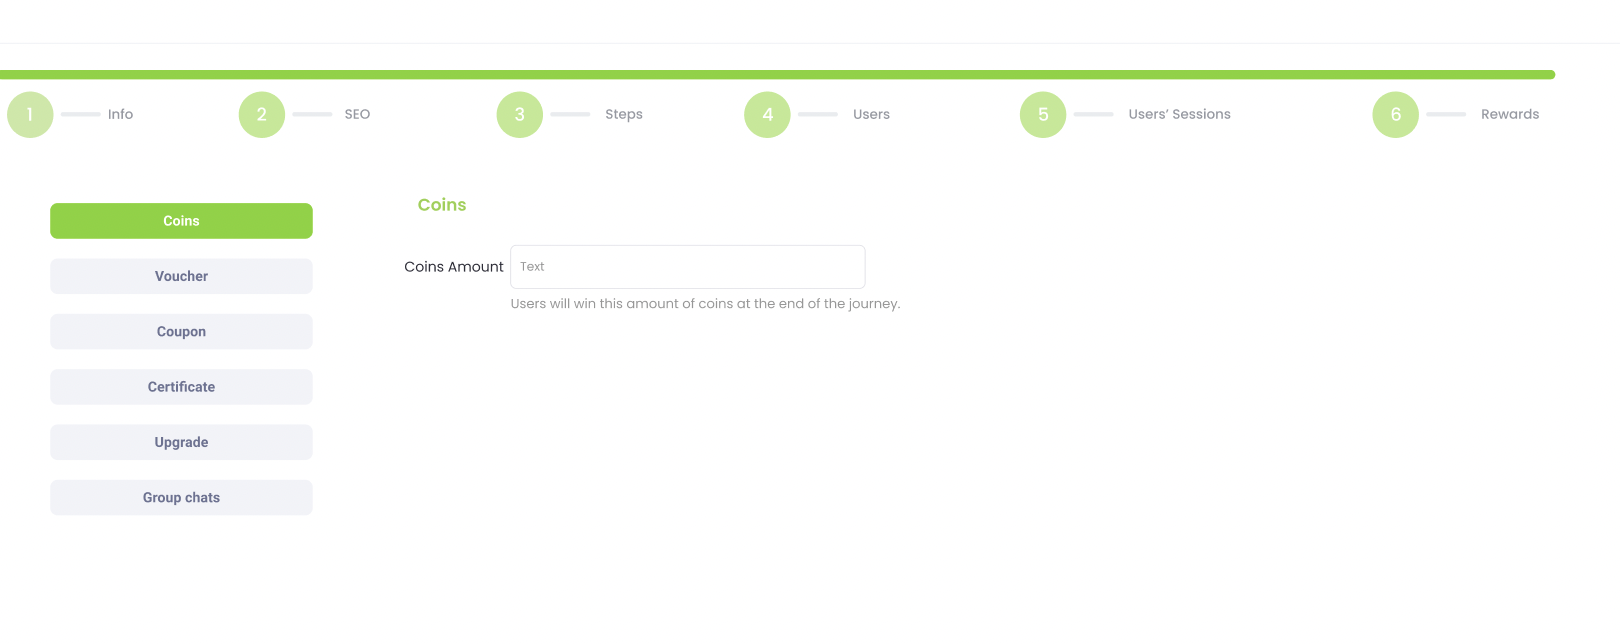
6. Rewards
In this step, you should select if you want to reward your users by:
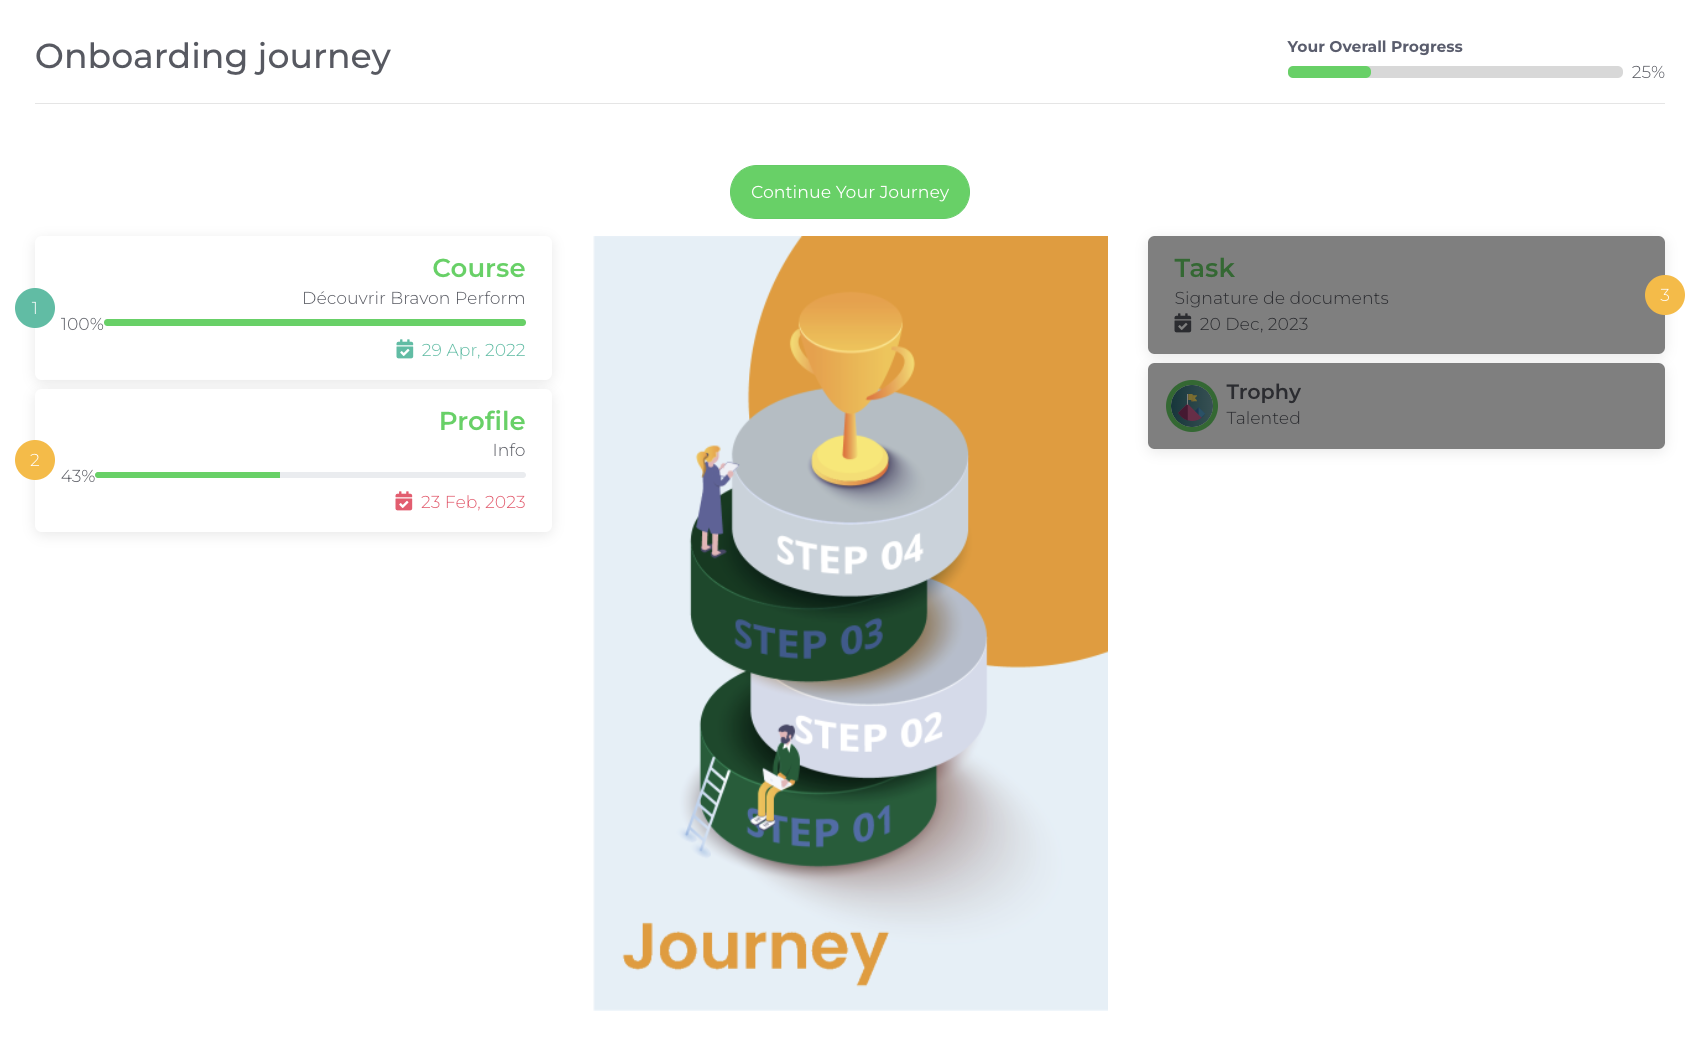
Academy -> Journeys -> Open Journey
If free:
You can s tart the journey and see your progress.
If paid:
Enroll -> Choose or add new card -> Confirm -> You can start the journey and see your progress.
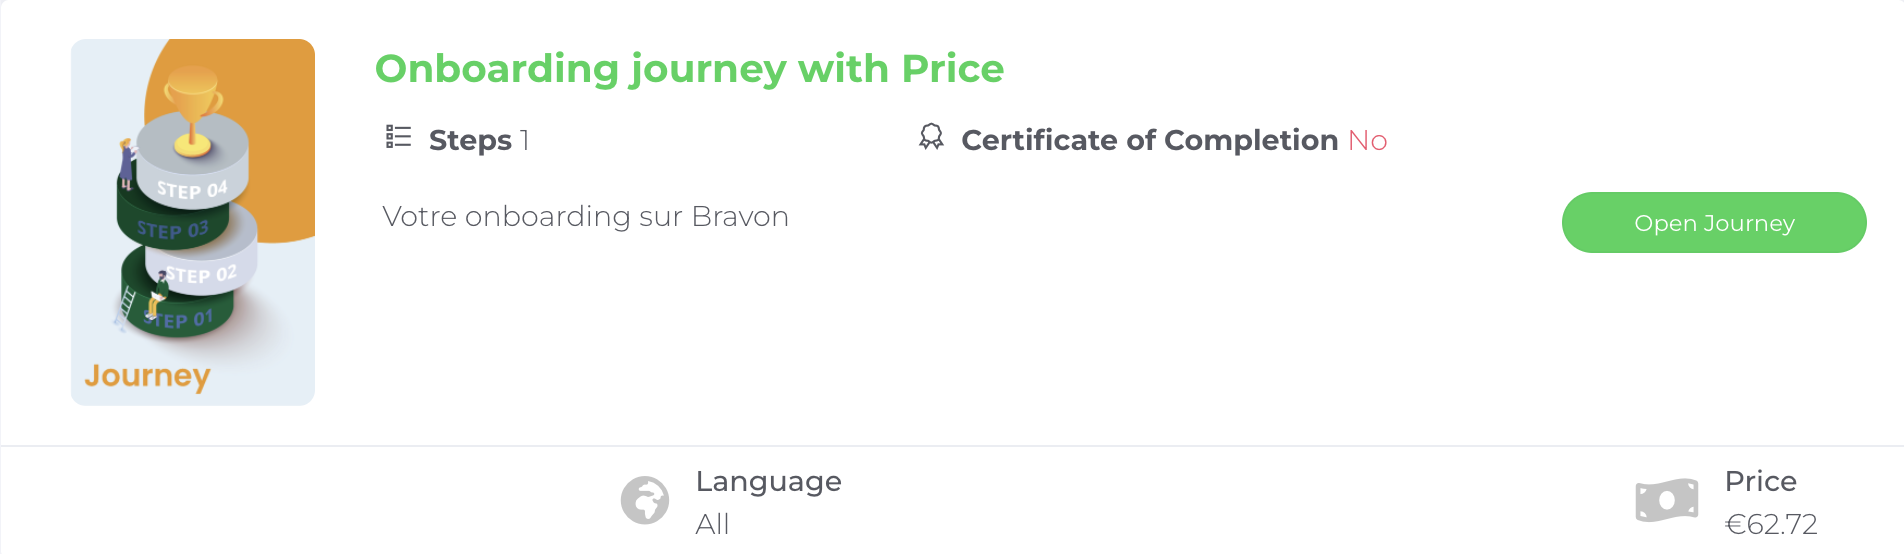
Note: If you have an uncompleted journey it will appear on top of the Journeys page and in your dashboard.