Marketplace -> Products -> + Add Product
Attention to the following Steps:
Step 1: Product Info
Publish: When selected, the product will be published on marketplace and be visible to all end-users.
Highlight: Select this checkbox if you want the product to appear on the highlighted products' block.
Translations: For Name, Description and Summary of the products, you must provide the translation to the languages available on the organization.
Subscription: Select this checkbox if products are available for subscription, providing flexible and recurring payment choices for users’ customers. The Admin can choose the frequency (only once, daily, weekly, monthly, half yearly, yearly, two years or three years) and the debit day.
Digital product: Digital products will have no shipment since they're not physical products. Instead, they will be delivered by email.
Pack: W
hen selected, the user will bundle different existing products instead of creating a new one.
Category: Select the category of the product. This will be used on the marketplace filters.
Product Type: Select the type of the product. This will be seen on the top tabs of the marketplace, in order to distinguish the type of products.
Available countries: Choose the countries that the product will be available in. Leaving it empty means it will be available in all countries.
SKU: Stock keeping unit is a number to differentiate and track inventory. Apply your product's SKU to easily manage the orders and stock.
Media: select an image for your product.
Step 2: Product Variations
In this step you have the products variations. For each product variation you should pay attention to the following steps:
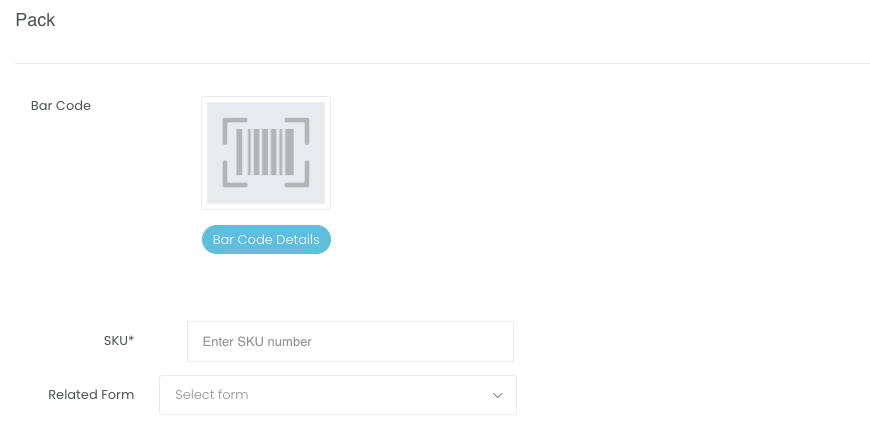
Pack: In this step, you will define the bar code, SKU and related form of the pack.
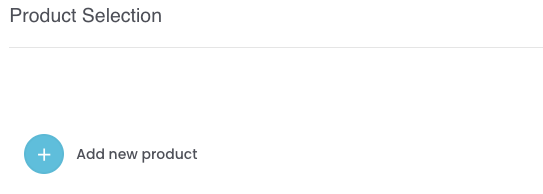
Product Selection: the admin can add different products with different quantities to the pack.
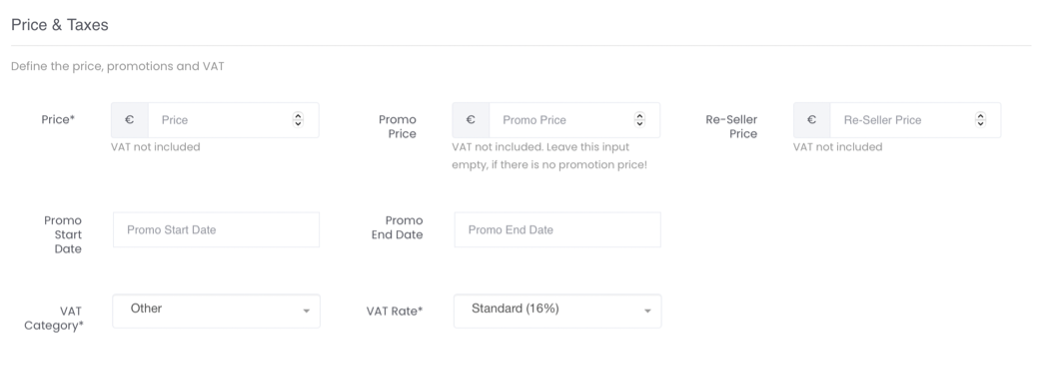
Price & Taxes Step: in this step, you will define the price, promotions, and VAT.
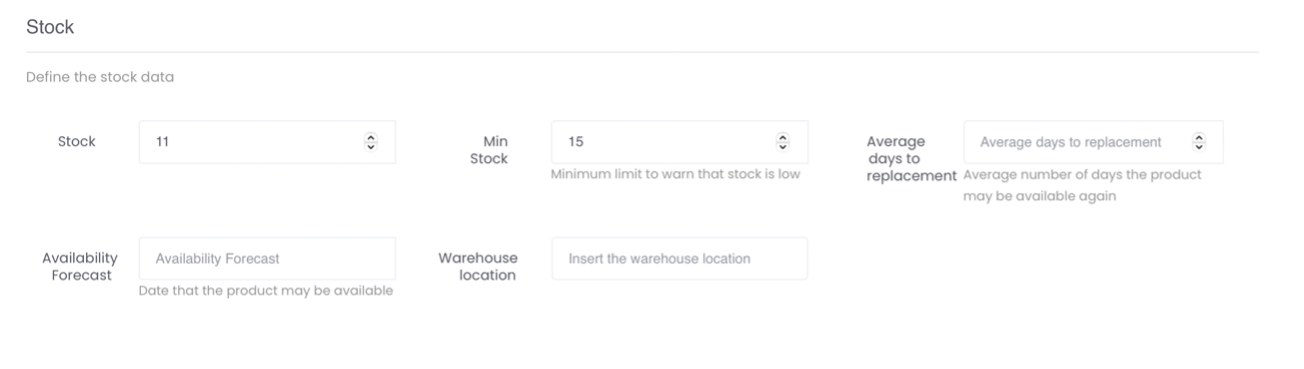
Stock Step: define all information about the stock.
Direct Selling Step*: Define the commissions related to product variation.*only available for direct selling companies

Invoice Info: This information will only appear on the order's invoiceYou can add a custom description and a UPC Code that will appear on the order invoice
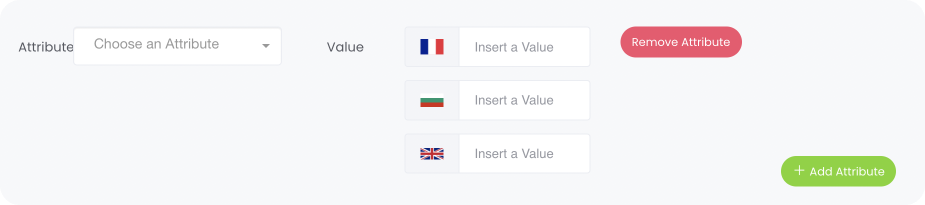
Add Attribute:
Per product, you can add several attributes. Select the type of attribute (from the list of attributes that were settled to that organization).
Step 3: SEO
Set the SEO information to improve the SEO of the product on the search engines.
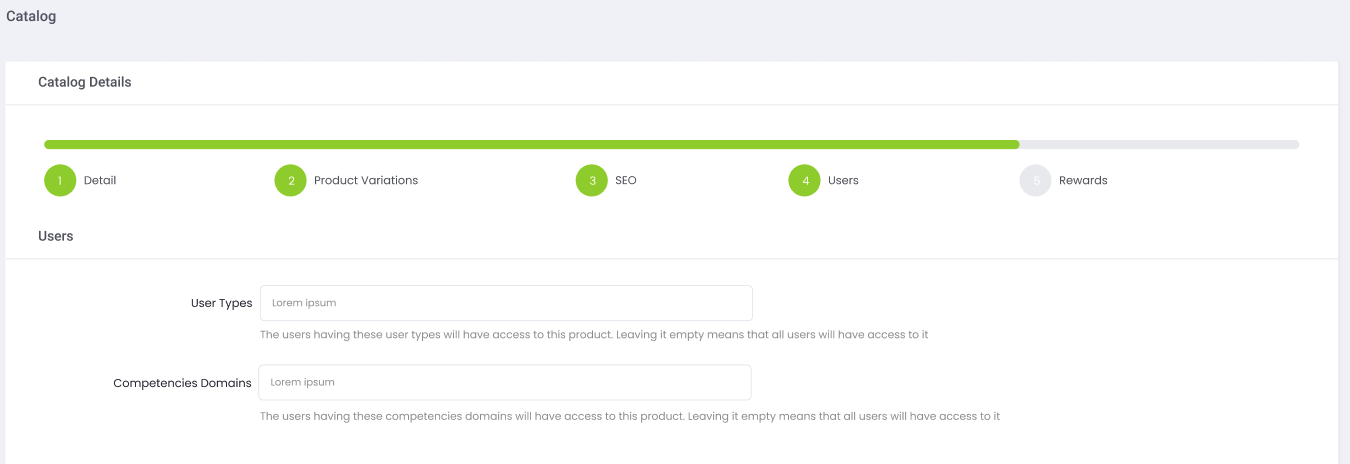
Step 4: Users
User Types: The users having the selected user type will have access to the created product. Leaving it empty means that all users will have access to it;
Competencies Domains: The users having the selected competencies domains will have access to the created product. Leaving it empty means that all users will have access to it
Step 5: Rewards
Upgrade User Types: Upgrade
users' experience by selecting your desired level of upgrade.
Competencies Domains: Upgrade users' competencies domains you want to upgrade.

Marketplace -> Stocks
On the stocks list page, you will have a table with all the products and variations, with their stock status and the number of stock.
On top of the page, you will find a button "Download CSV" so you can download a CSV file with this list.
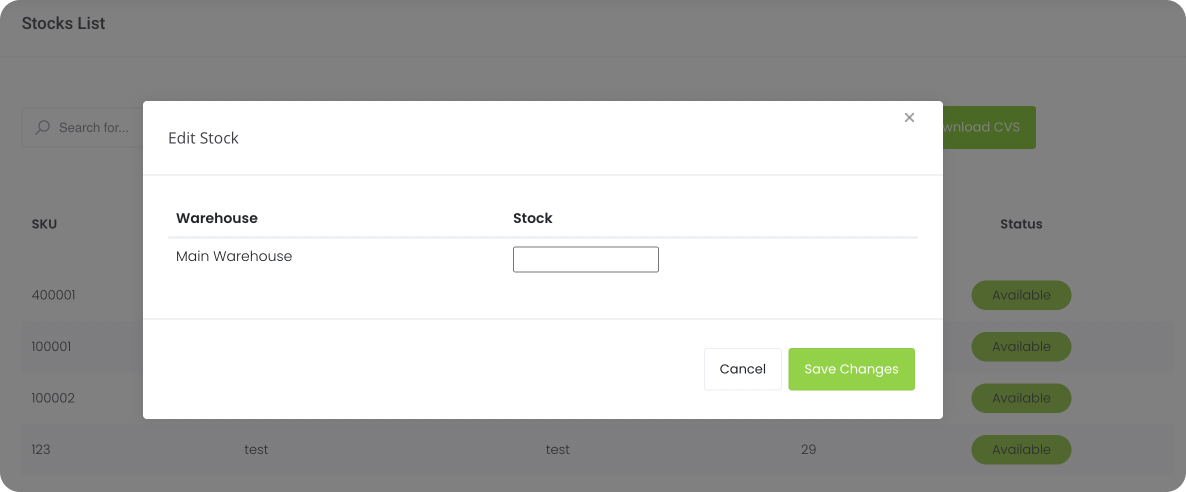
By clicking on one entry of the table, it will open a popup so you can edit the stock amount.
It's now possible for Admins to manage the stock by Warehouse.
Rules
When there is a warehouse in the same country as the user we use the stock of that warehouse.
When there are multiple warehouses in the same country, we choose the default warehouse.
When there are multiple warehouses in the same country and no default warehouse in that country, we choose the first warehouse on the list.
When there are no warehouses in the country of the user, we use the configured default warehouse.
Marketplace -> Warehouses
Add Warehouse
Name: Define the name of the Warehouse.
Warehouse Id: Define the Warehouse Id.
Is Default: When selected, the Warehouse is chosen by default.
Status: Choose between "Active" and "Closed".
Description: The Admin can write a description for the Warehouse.
Address: The admin must choose the warehouse address and fill in the following points: address line 1, address line 2, zip code, city, state and country.
Manage Warehouse
Admins can view, edit or remove a warehouse on the "Actions" tab. On top of the page, you will find a button "Export Results" so you can download a file with the results.

Marketplace -> Orders
On the orders list page, you will have a table with all the orders made on marketplace. You can easily download the invoice and see the status of each order. In these table you have the following options: pending payment, pending, processing, processing error, completed, canceled, refunded, failed, or lost.

View order
In this page you will have the details of the order, where you can:
Change status
Change the status of an order, easily, by clicking on Actions -> Change status
On the top of the page, you will find a button "Export Excel" where you can download an excel with the order's list.
Create order
By clicking on the "make an order" button, you will be able to create an order for another user. Here you will need to define:
Once you place the order, the user will receive an email to confirm the order and add the payment method.
Refund order
By clicking on the "refund" button, on the detailed page of the order, you will be able to refund the user partially or totally. You will then find the following popup:

You can either choose to refund by the quantity of products (select which products you want to refund) or choose to refund a manual value (not related to specific products). On the second option, this will not have impact on your VA amount. If you refund per product, you will loose the VA's that you've earned with that product.
Marketplace -> Opportunities
On the opportunities page, you will have a table with all the opportunities made on marketplace. You can easily view opportunities and see the status of each opportunity.
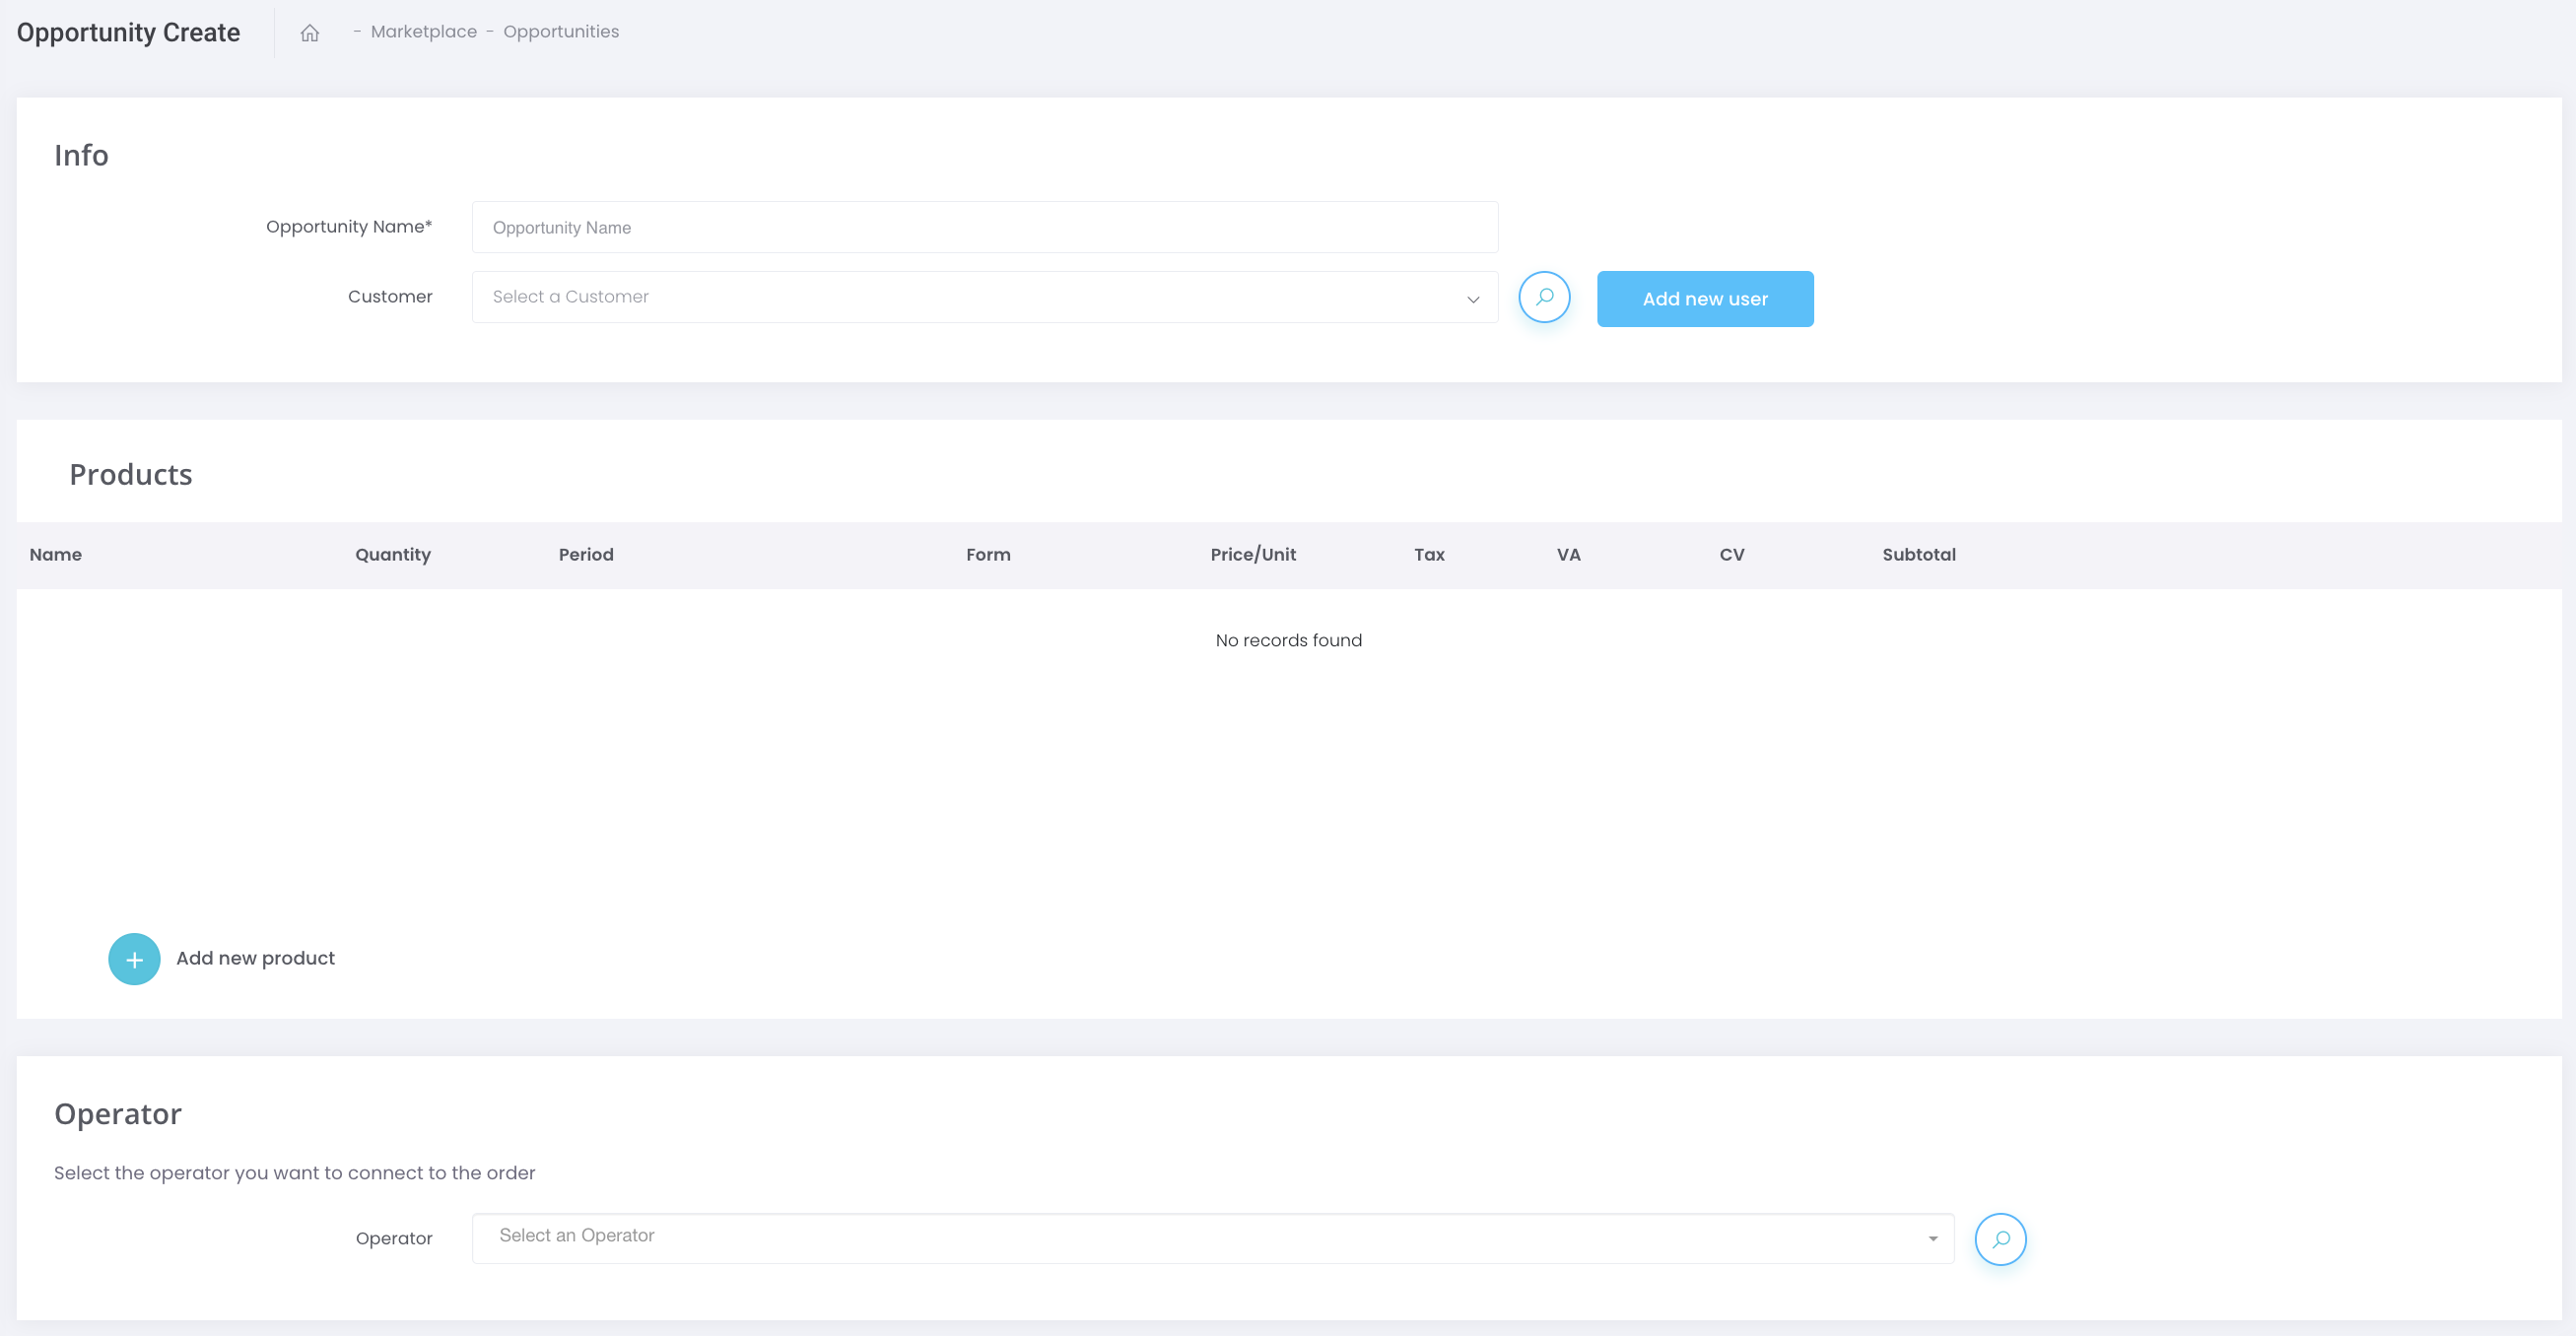
New Opportunity
Attention to the following Steps:
Opportunity Name: Write the opportunity name.
Customer: Select a customer or add a new one selecting "Add new user"
Billing Address: Choose the billing address of the opportunity.
Shipping Address: Choose the shipping address of the opportunity.
Products: Select the products that will be part of the opportunity.
Operator: Select the operator you want to connect to the opportunity.
The user will receive an email to accept or reject the opportunity.
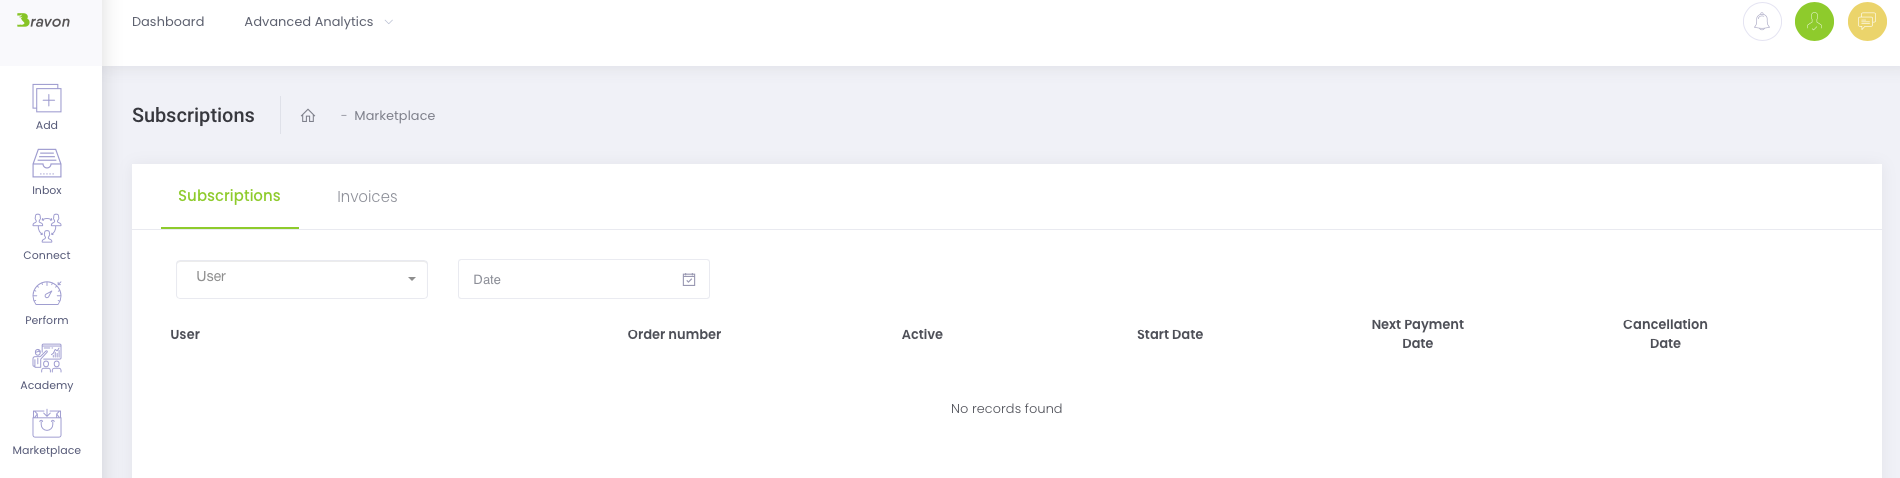
Marketplace -> Subscriptions
On the Subscriptions page, you can see all the product subscriptions of all users in one place.
Marketplace -> Subscriptions -> Invoices
The Invoices tab displays all the users' invoices related to their plan subscriptions.
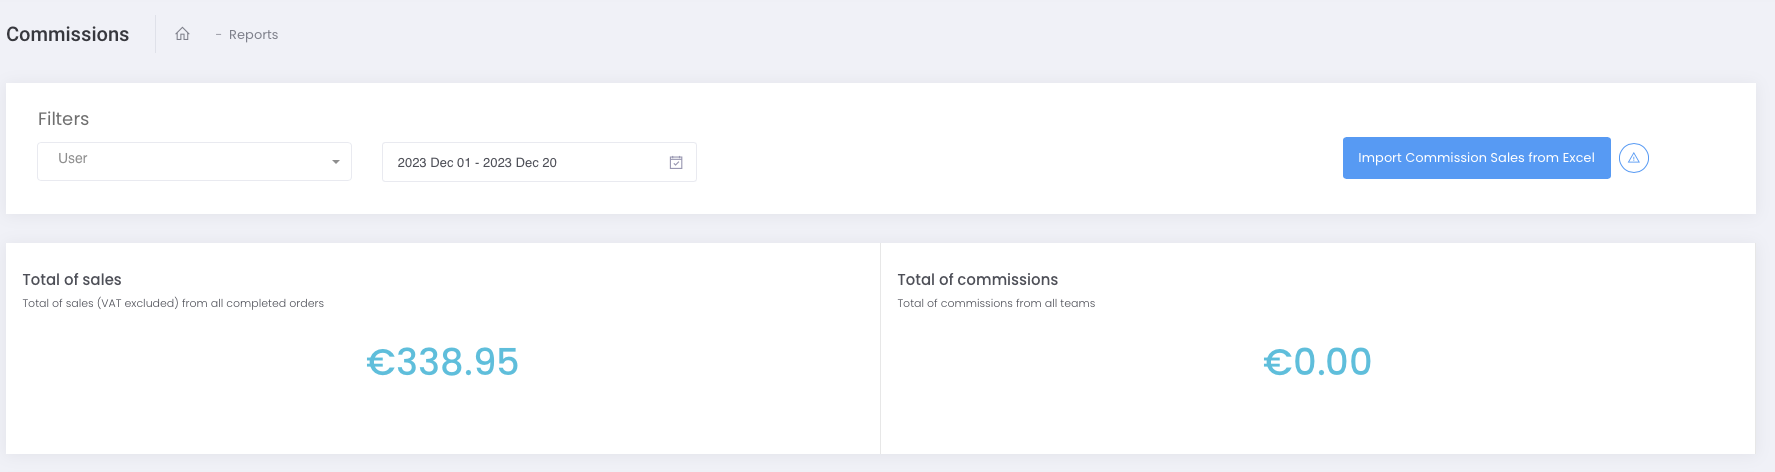
Dashboard -> Advanced Analytics -> Marketplace -> Commissions
On this page, you will find a blue button in the upper right corner labeled ''Import Sales Commissions from Excel,'' which facilitates the import of an Excel document. After clicking 'Import' and selecting the desired file, a pop-up window will appear, displaying the loaded rows and columns. Subsequently, if there is a notification of any errors, it will be necessary to make the required corrections before confirming the import by clicking the ''Confirm'' button.
Note: only for Direct Selling clients.
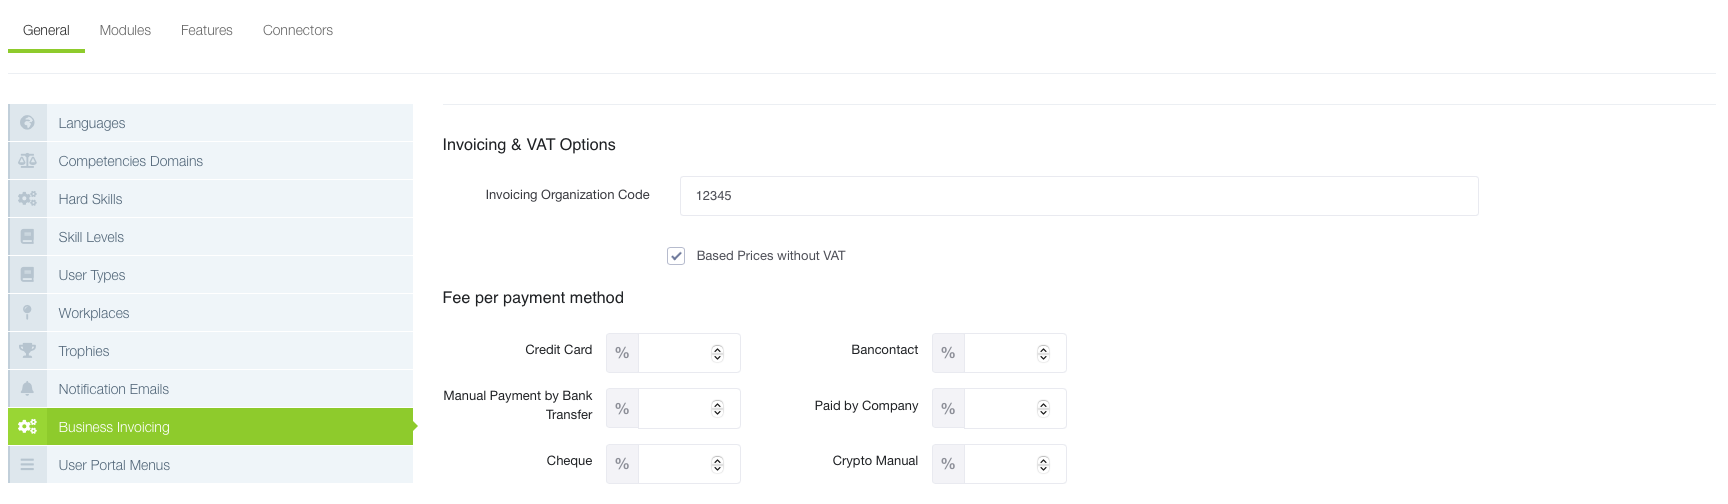
Settings -> Configurations -> General -> Business Invoicing
On this page, users will find at the beginning of the page a field prepared to insert the '''Invoicing Organization Code''.
''Me Profile'' Icon -> Profile -> Settings
On this page, users will find at the beginning of the page a field prepared to insert the '''Invoicing Code''.

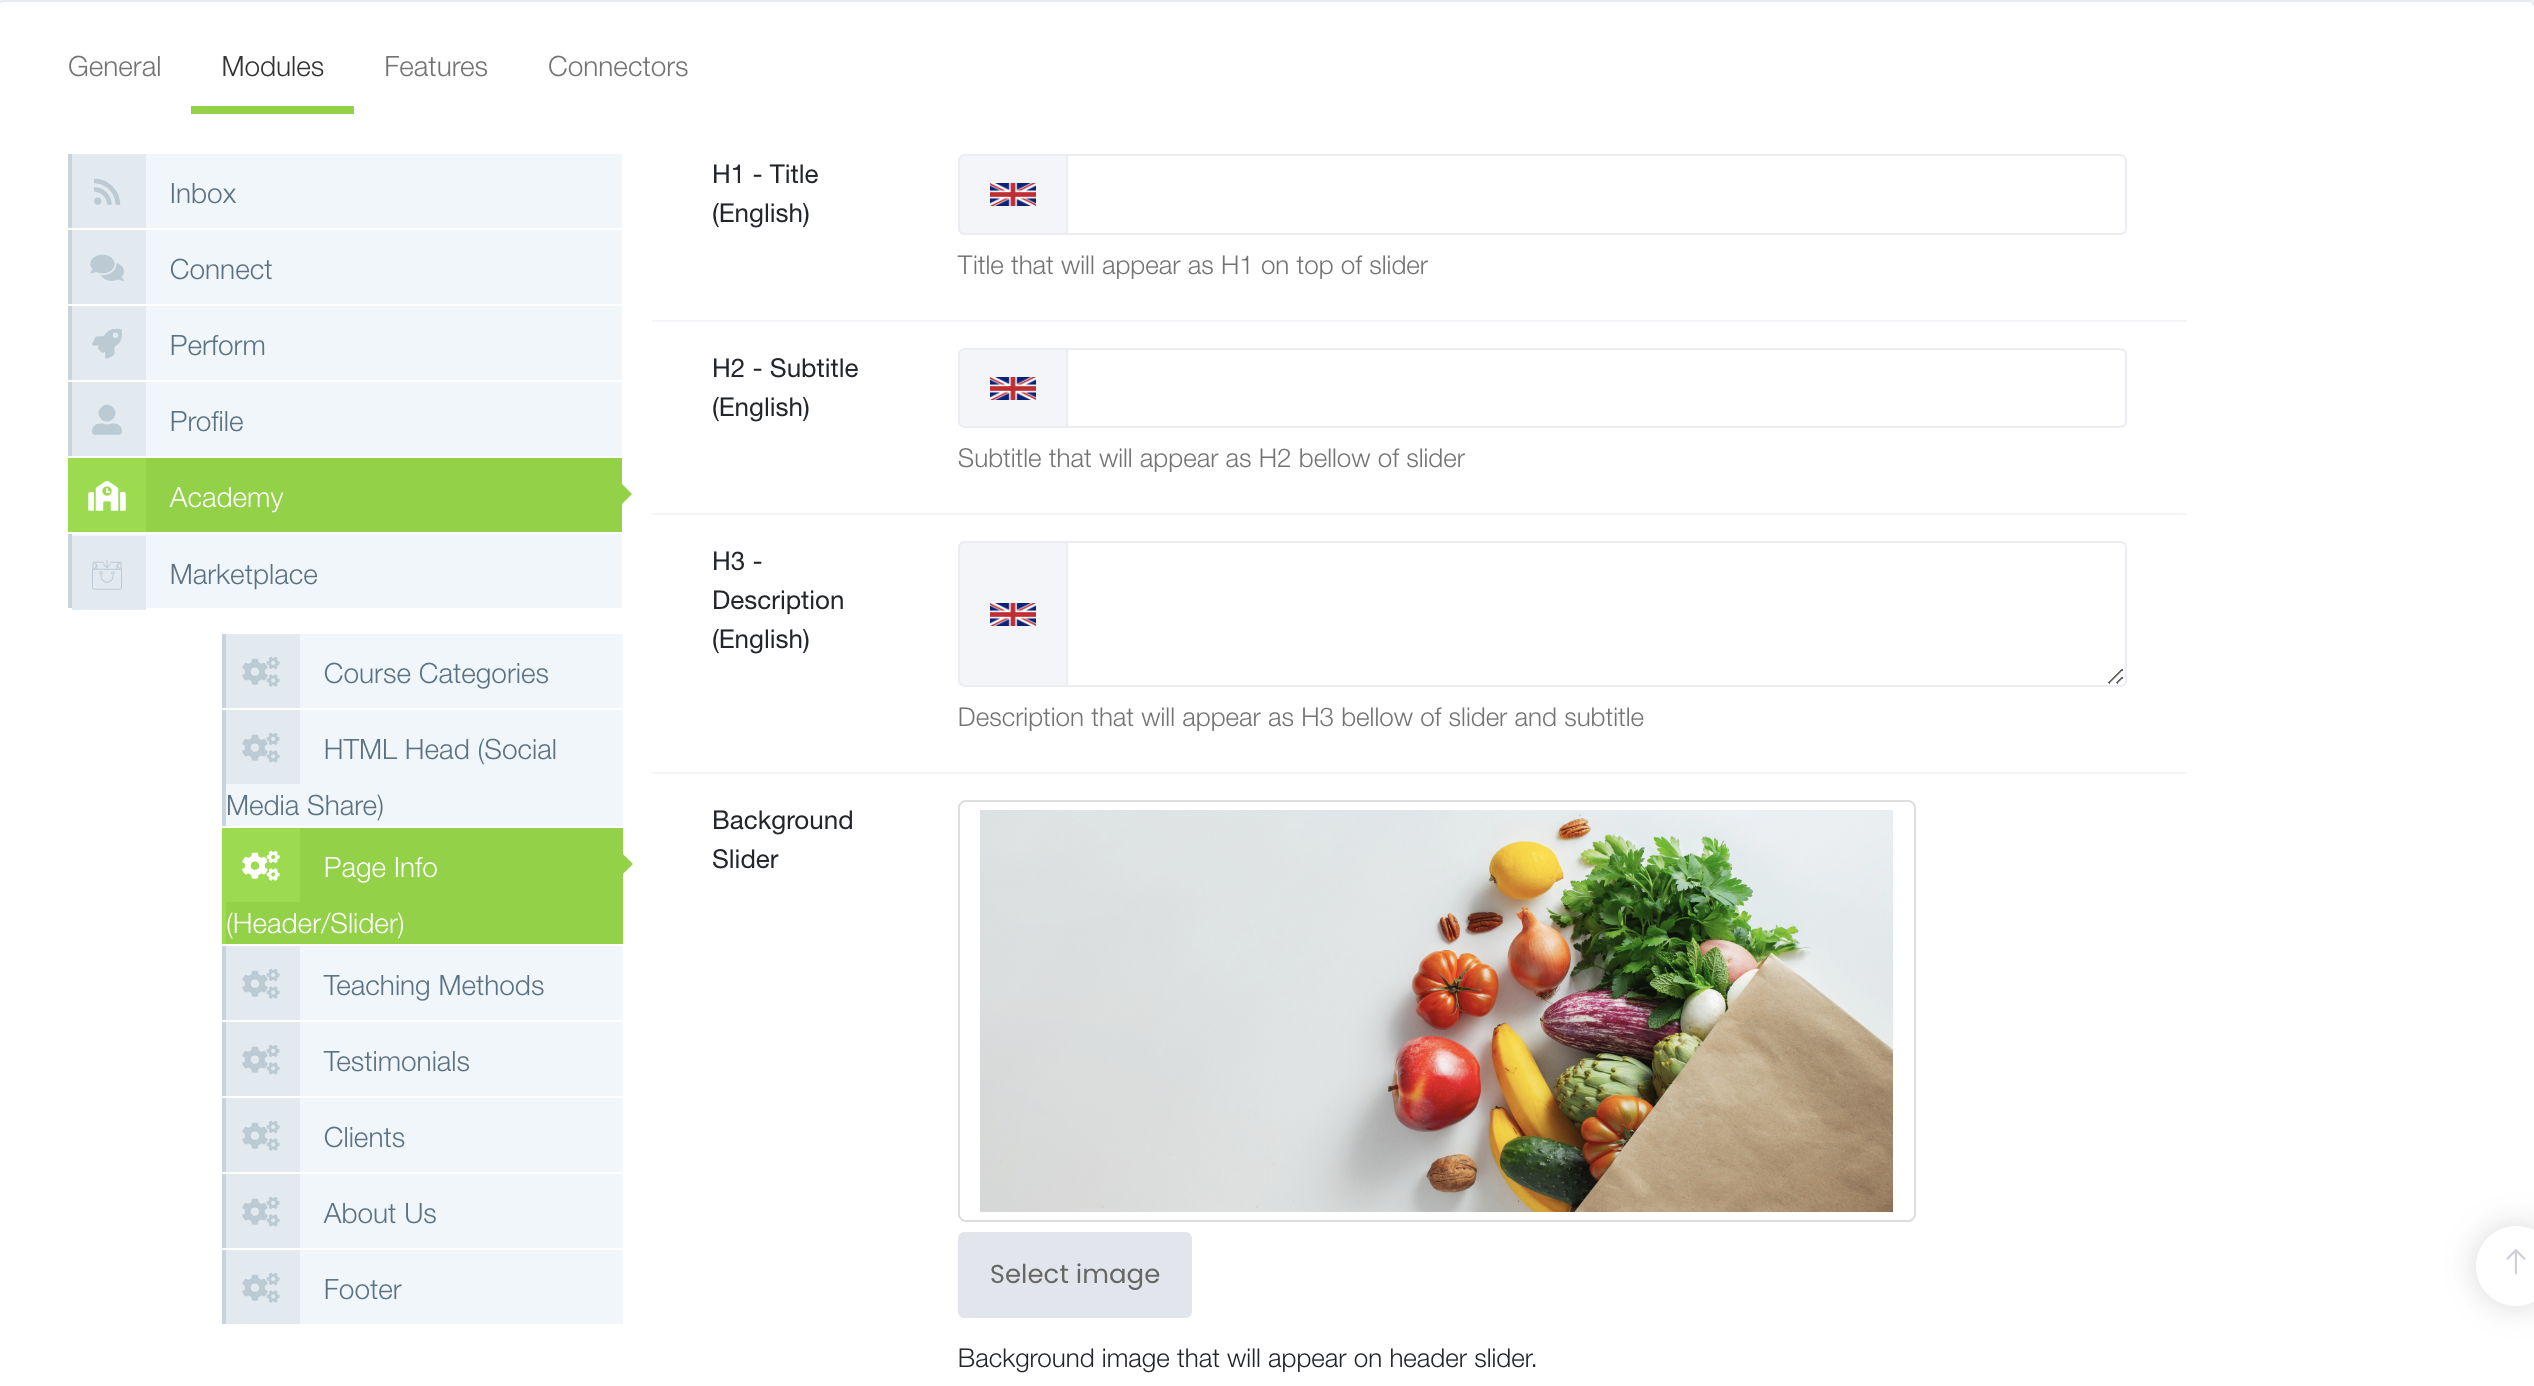
Settings -> Configurations -> Modules -> Academy -> Page Info
On this page, users can update the marketplace homepage and change titles and images.
H1 - Title: Title that will appear as H1 on top of slider (maximum 70 characters).
Background Slider: Background image that will appear on header slider.
Background Slider (Responsive Resolution): Background image that will appear on header slider in smaller devices.
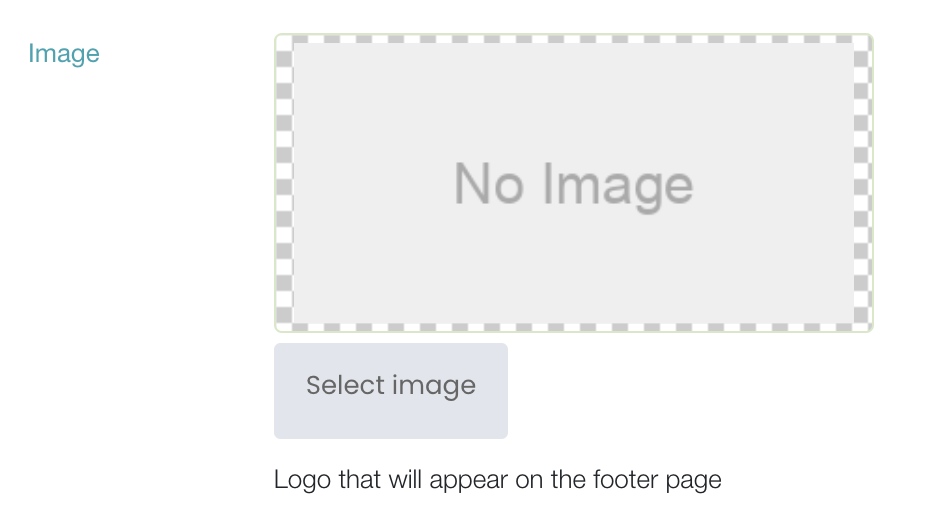
Settings -> Configurations -> Modules -> Academy -> Footer
On this page, users can update the marketplace footer.
Image: Logo that will appear on the footer page.
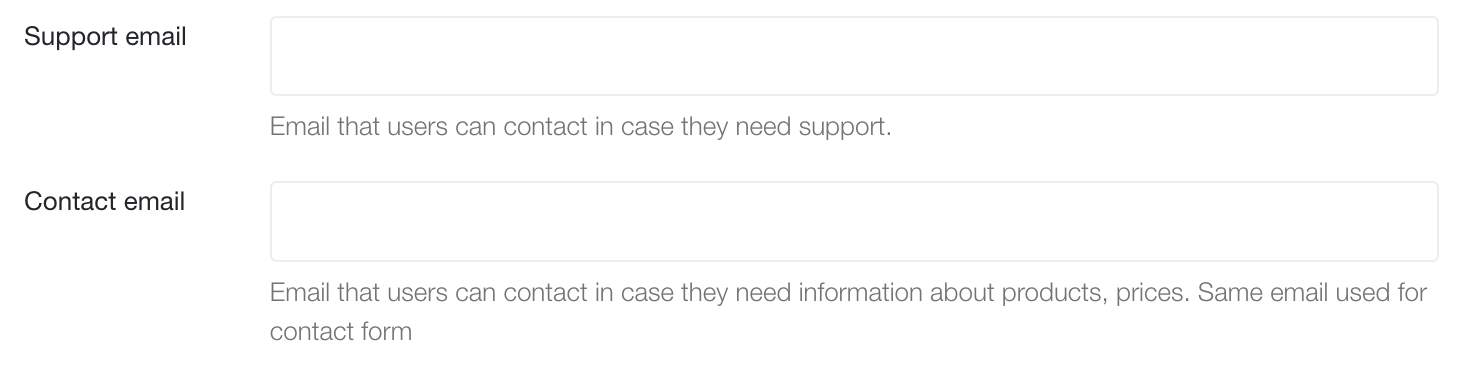
Support email: Email that users can contact in case they need support.
Contact email: Email that users can contact in case they need information about products, prices. Same email used for contact form.
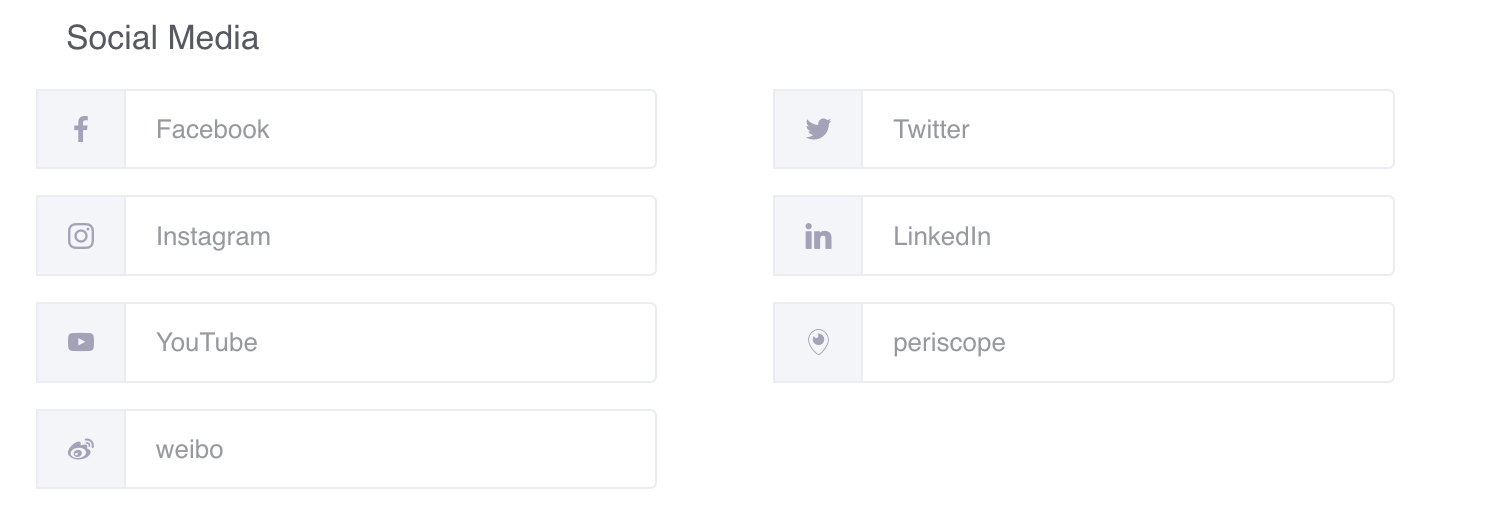
Social Media: U
sers can add links to Facebook, Instagram, YouTube, weibo, Twitter, LinkedIn and periscope.
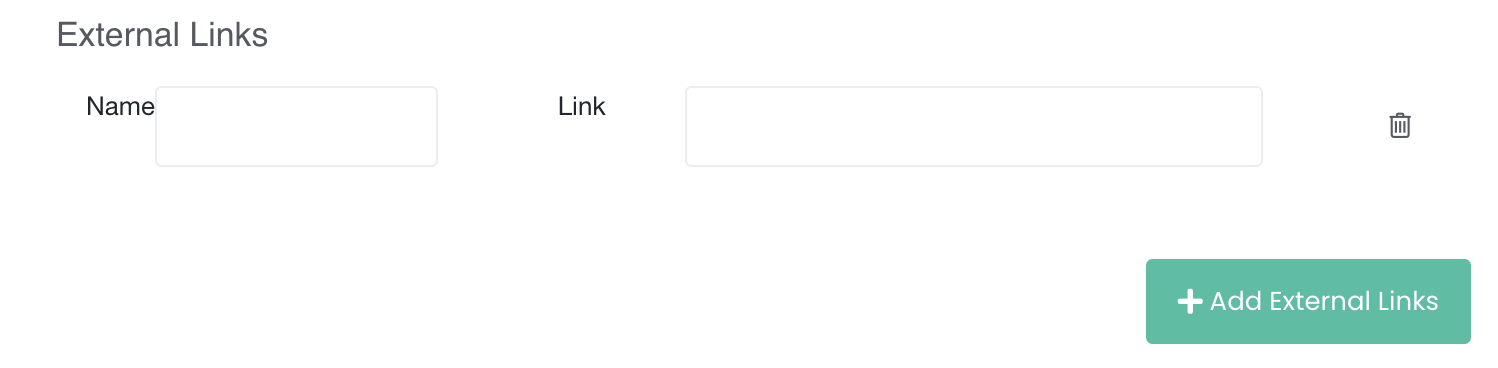
External Links: Users can add external links.
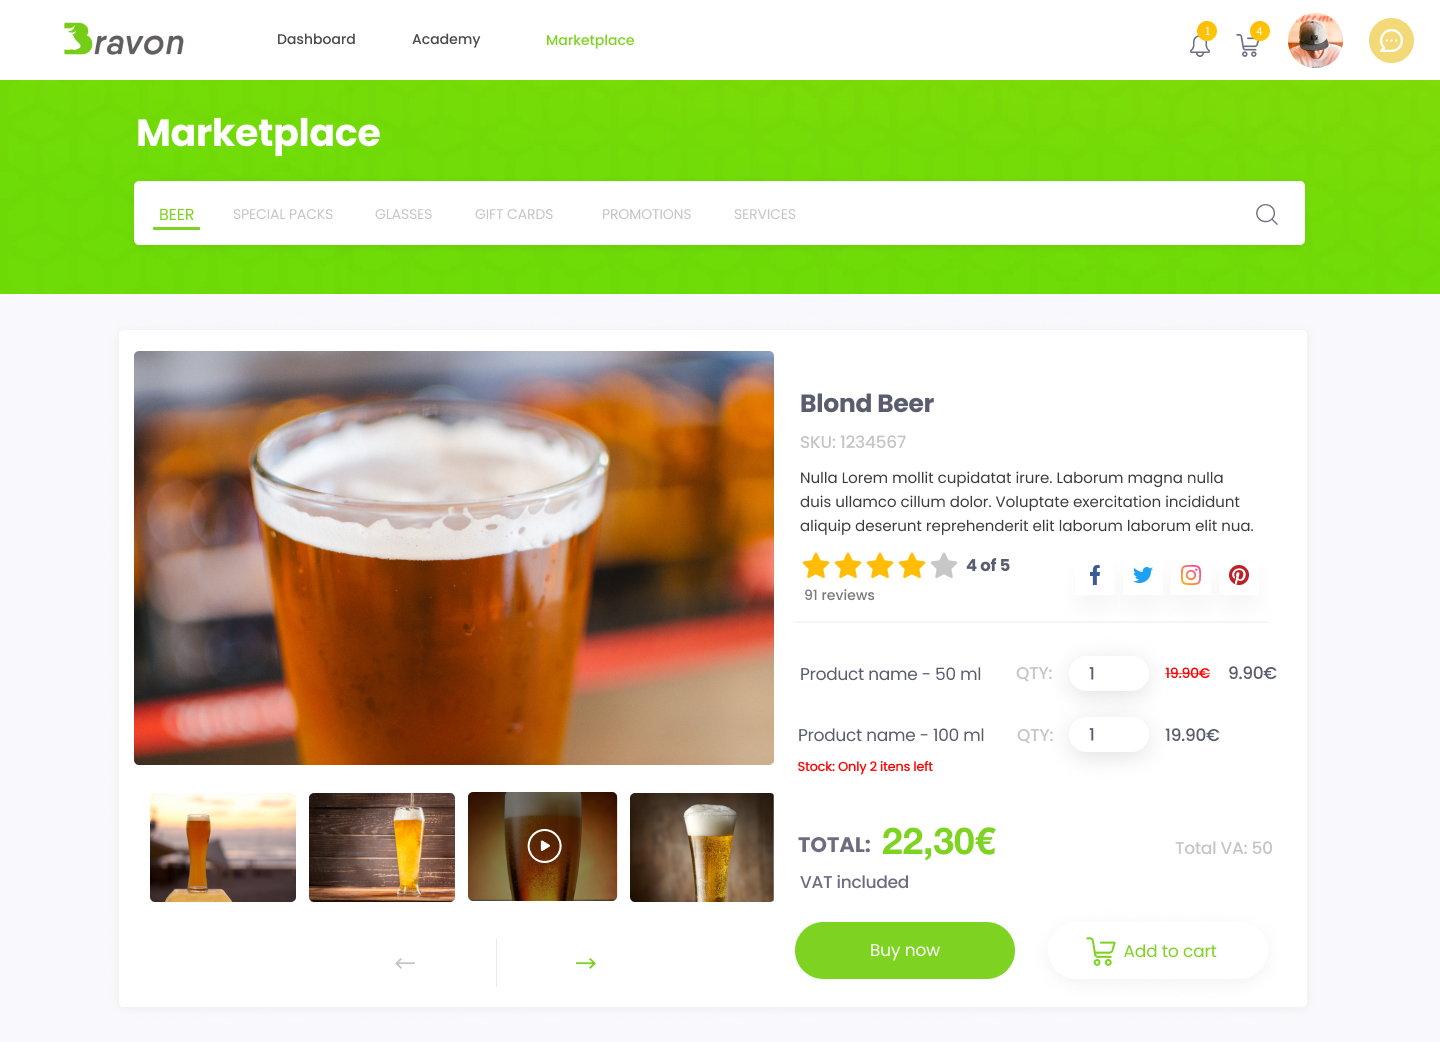
Marketplace -> Select a product
When you open a product, you can see all the details of the product, like variations and the stock. Select the quantity and you have two options:
Buy now: to go directly to cart and proceed to the product's checkout.
Add to cart: to add the product to the cart. You can go to your cart, see all the products you've added and proceed to checkout.
Step 1:
Step 2:
Step 3:
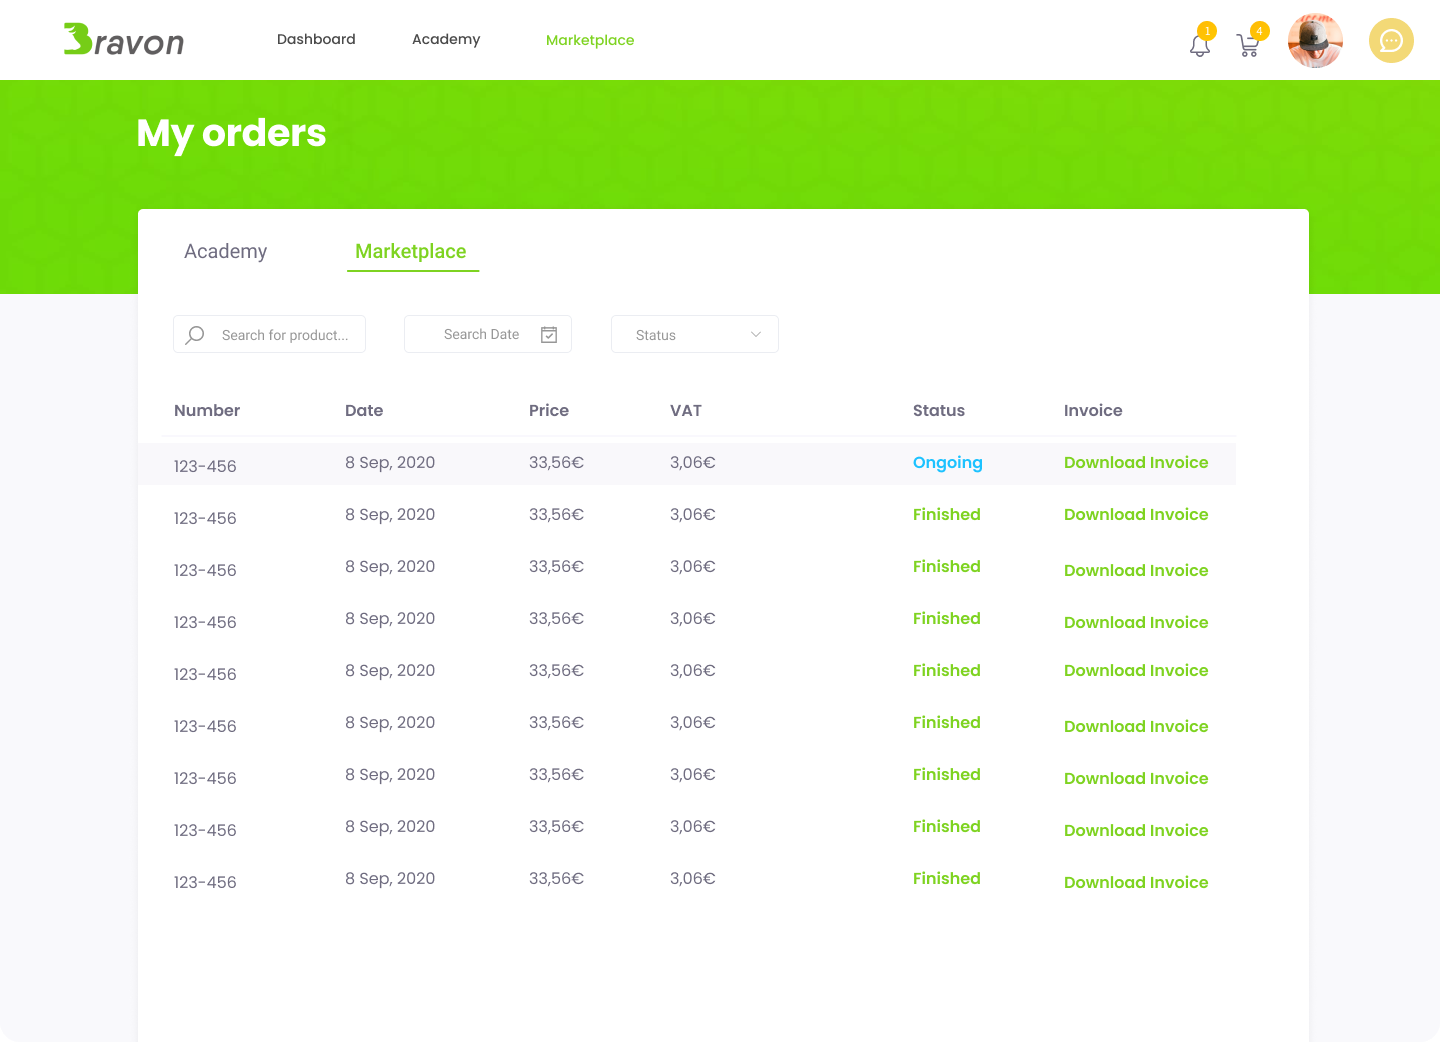
Click on your profile picture (top right corner) -> My orders
You can see all the orders you've made in a list, and you can easily check the order' status and download the invoice.
If you click on an list entry, you can see the order's details page where you can send a refund request if you need.